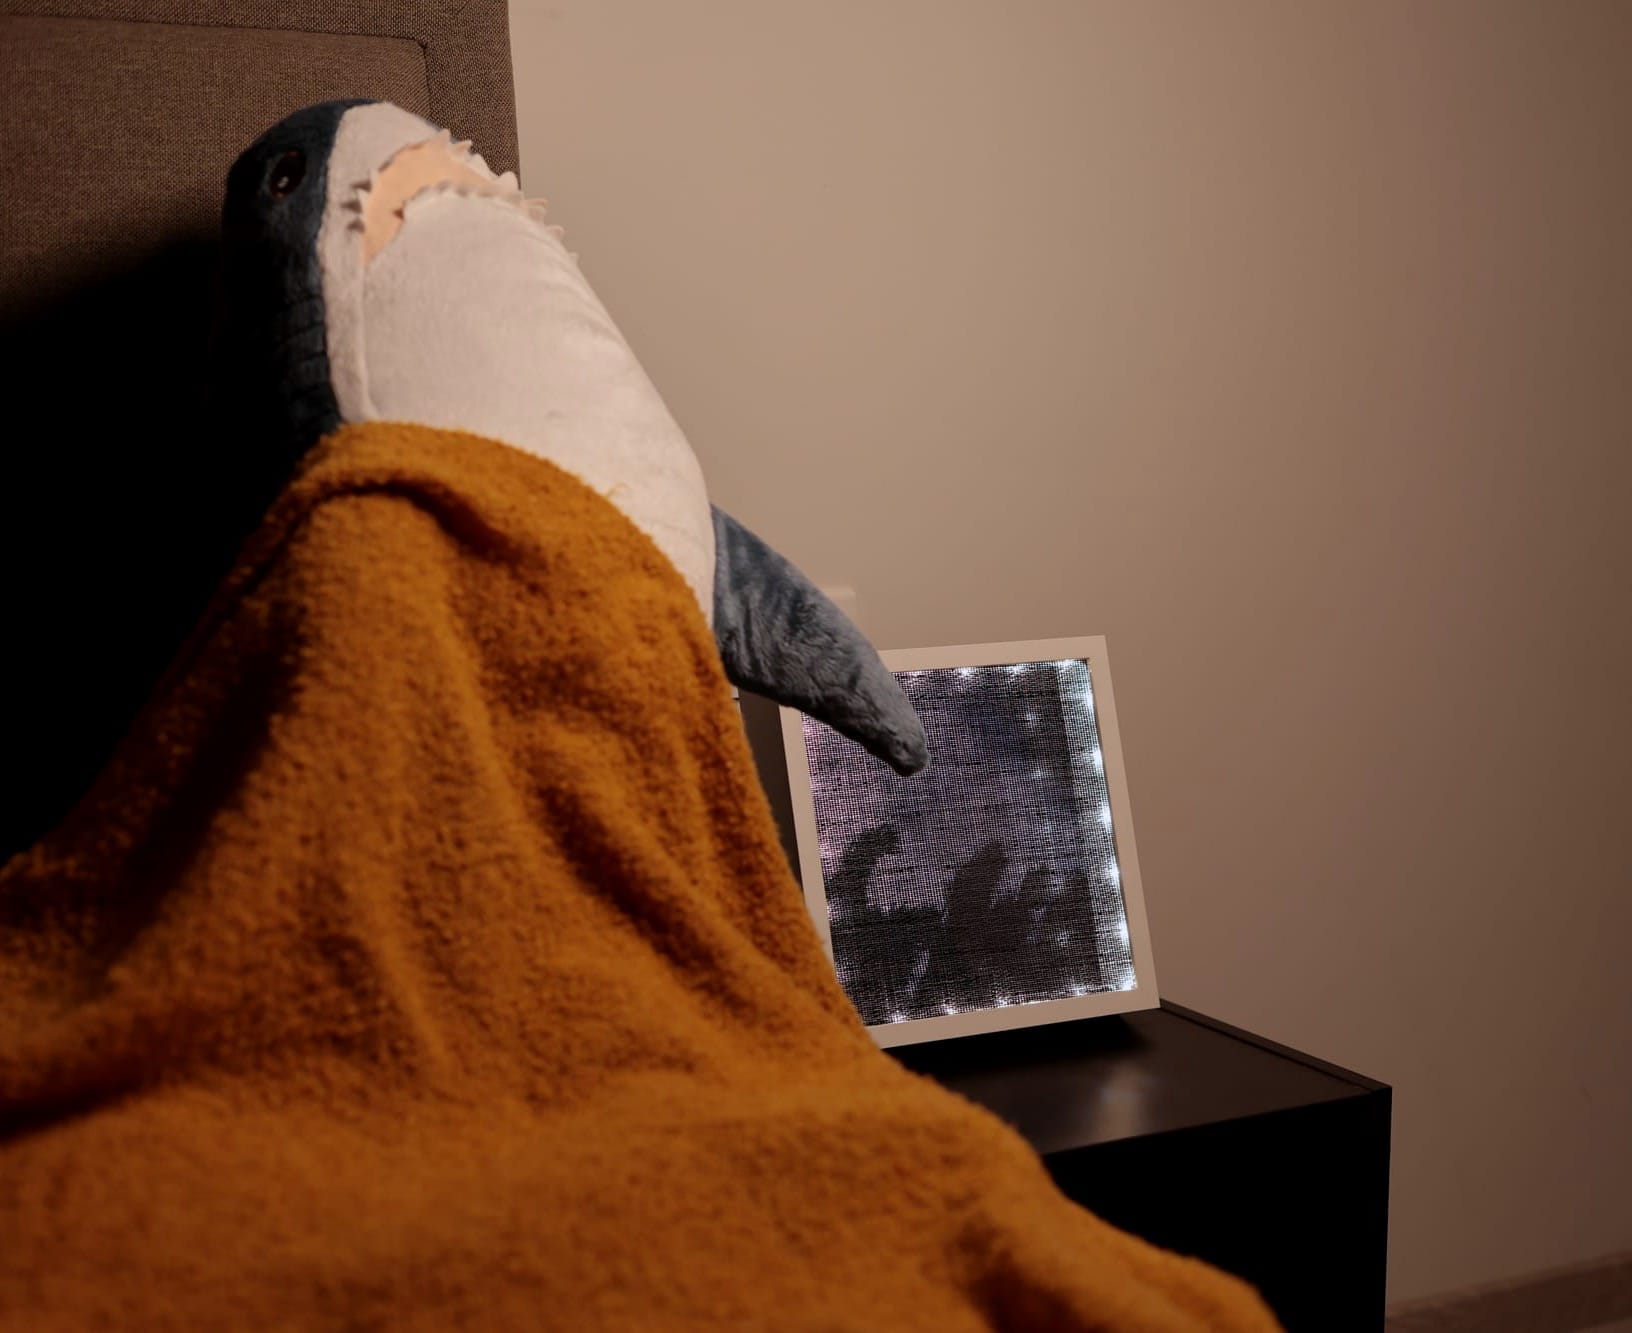
DIY Ikea - Bedside photo frame table lamp
Let your creativity take the charge and build a unique dust-proof bedside photo frame table lamp - easily accessible from the bed and customisable according to mood, season or situation.
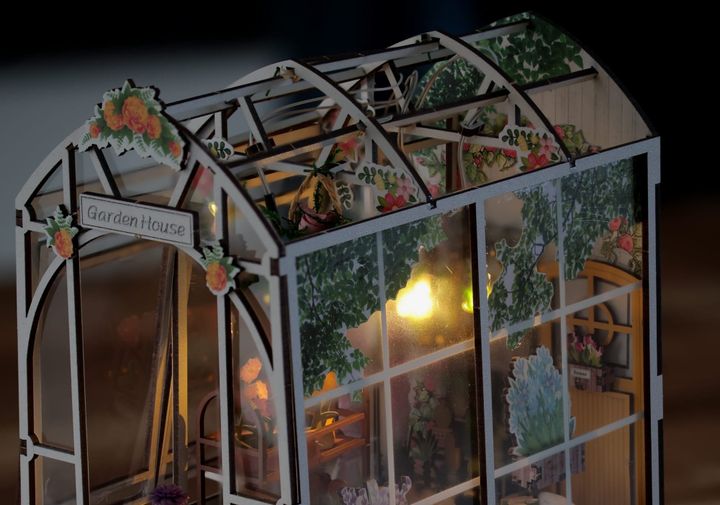
To build it as is in the photo above -
Materials Required
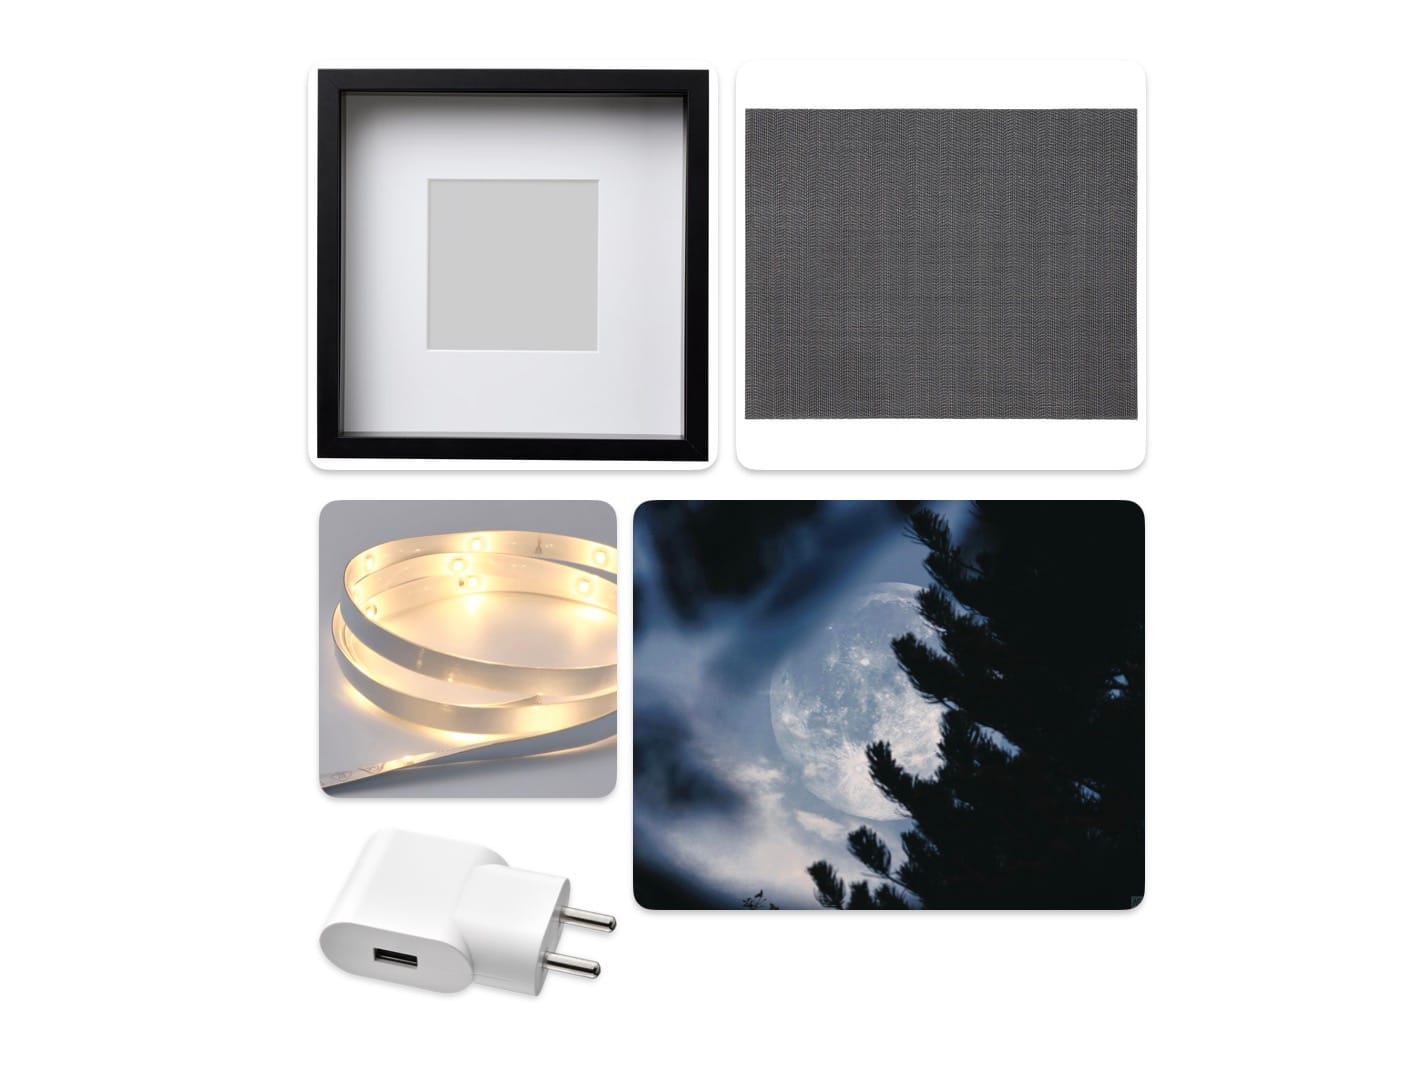
- Sannahed Photo Frame (25x25cm)
- Vattensten LED Lighting Strip (1m)
- Flygfisk Table place mat (38x30cm)
- Standard USB adapter/charger (Smahagel USB charger)
- One Photograph/artwork for background (25x25cm)
- One pair of scissors
Cost of project
The total cost of making this bedside photo frame table lamp (as is) comes to INR 1400/-
Process
Start by disassembling the Sannahed Photo Frame. This photo frame by Ikea has a unique feature, it allows space for a deep frame effect, meaning, you can place the photo in front of the frame, close together with the transparent shield or further back, creating space between the shield and the photograph. This space is exactly what we're going to use to place the LED light.
Remove all the layers from the photo frame. Now you should have only the outer structure of the frame and your hand should be able to hold the frame through and through. This will help place the LED strip properly. Unpack the LED strip.
Carefully measure the length of the LED strip against the inside of the frame. The objective is to have the wire part of the strip stick out only from the corner. Peel the back sticky tape from the LED strip piece by piece and begin sticking it to the frame.
You can choose to stick it in the front of the frame or towards the back. Since the frame is reversible, you can decide this even after the frame is ready based on how it appears. Back side light will make the whole frame glow more evenly. But front side light will ensure good lighting on the photo.
After sticking the main strip, use the double sided tape provided with the LED strip to secure the connector to the base of the frame. Use additional wire supporters to place the rest of the wire inside the frame and take it out from the nearest corner.
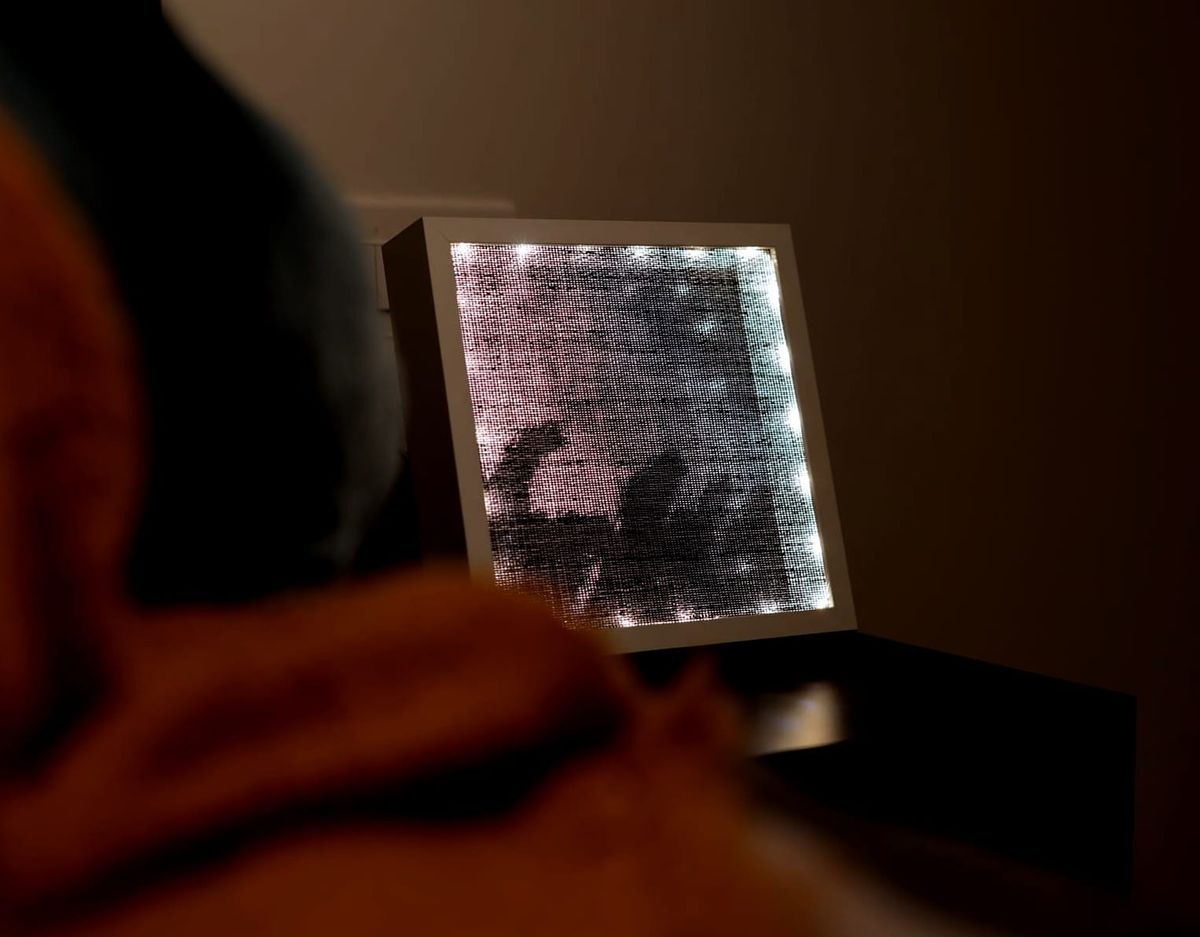
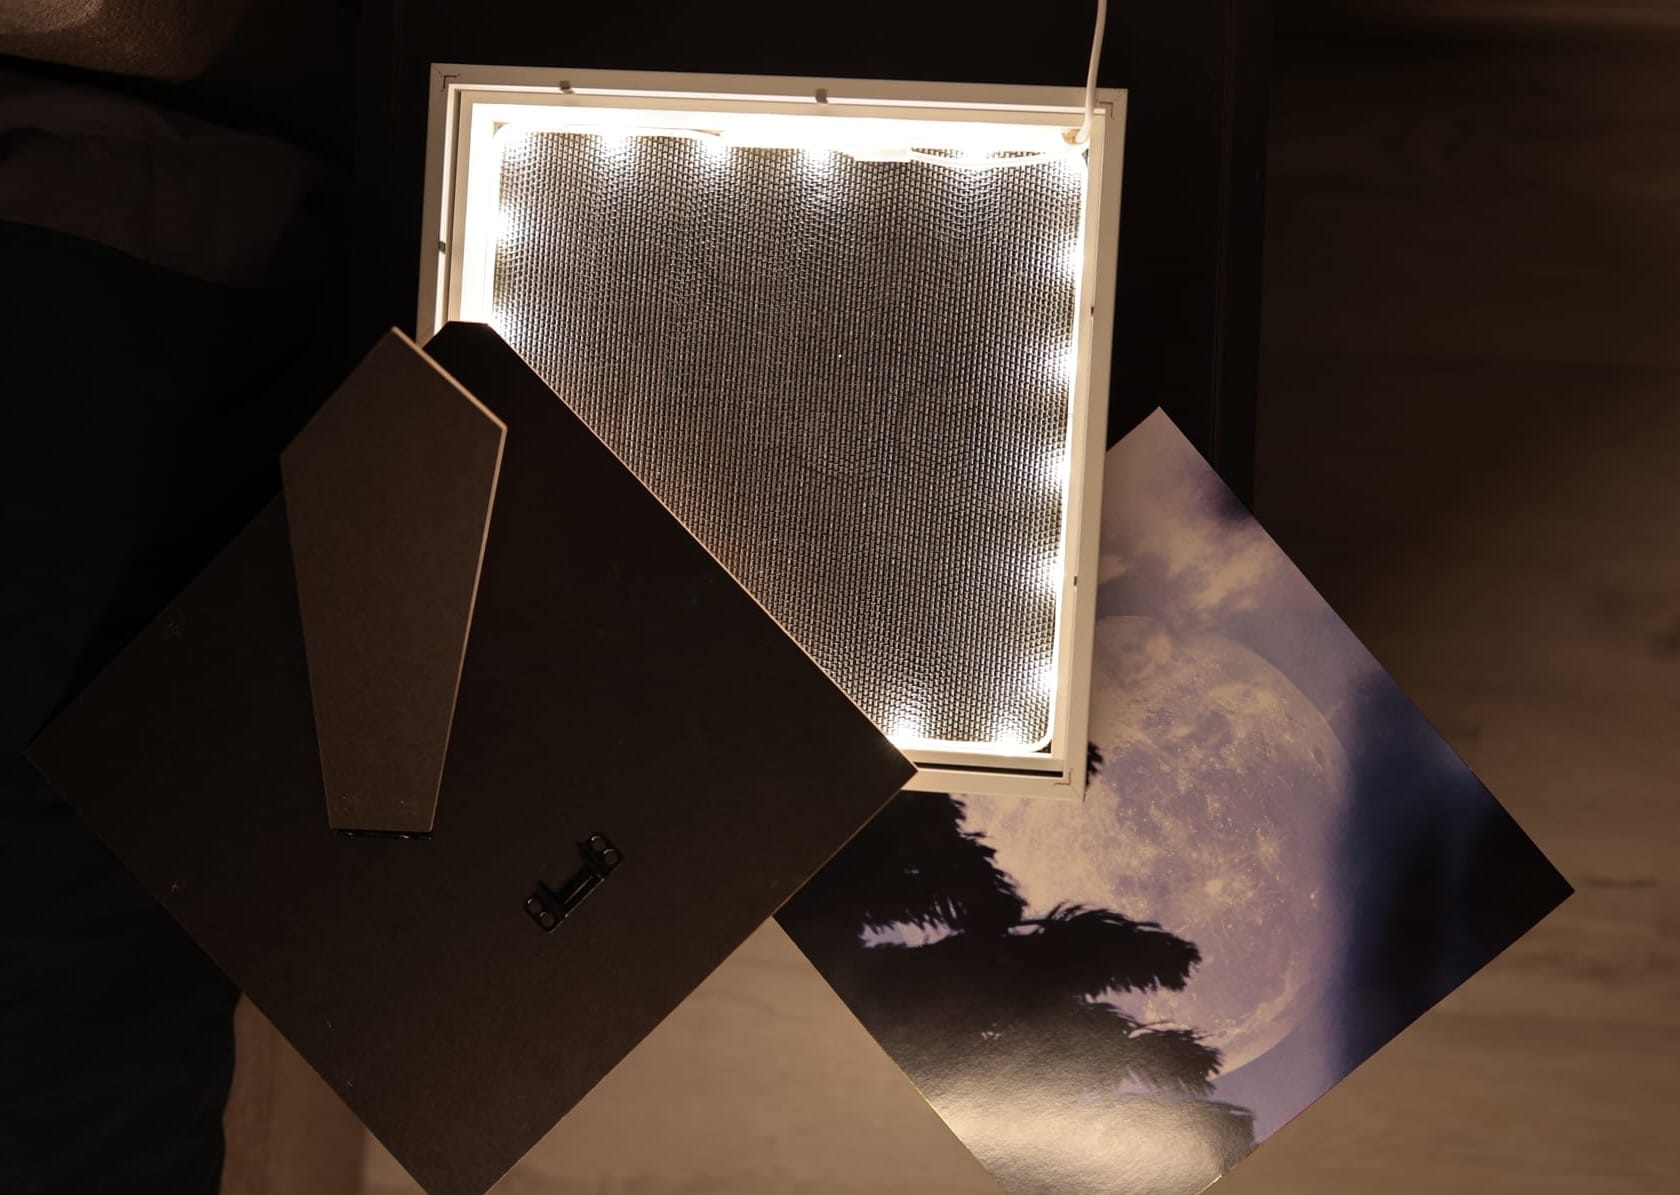
Now cut the table place mat to the size of the frame (25x25cm). You can use any frame sheet to measure the place mat accurately. This place mat has small sieve like openings which filters light out giving it exactly the right amount of glow. The LED light in itself is very bright so we need something to soften it. You can use any other placemat, cloth, craft material available in place of the suggested mat.
Place the transparent plastic sheet of the frame back. Add the placement on it from the inside. Find a suitable photo in the size of the frame. Place it in the frame, near the back cover. Close the back cover of the frame. You may need to cut a small triangular piece in the corner of the back cover and photograph to let the wire out comfortably. Note that there shouldn't be too much tension in the wire.
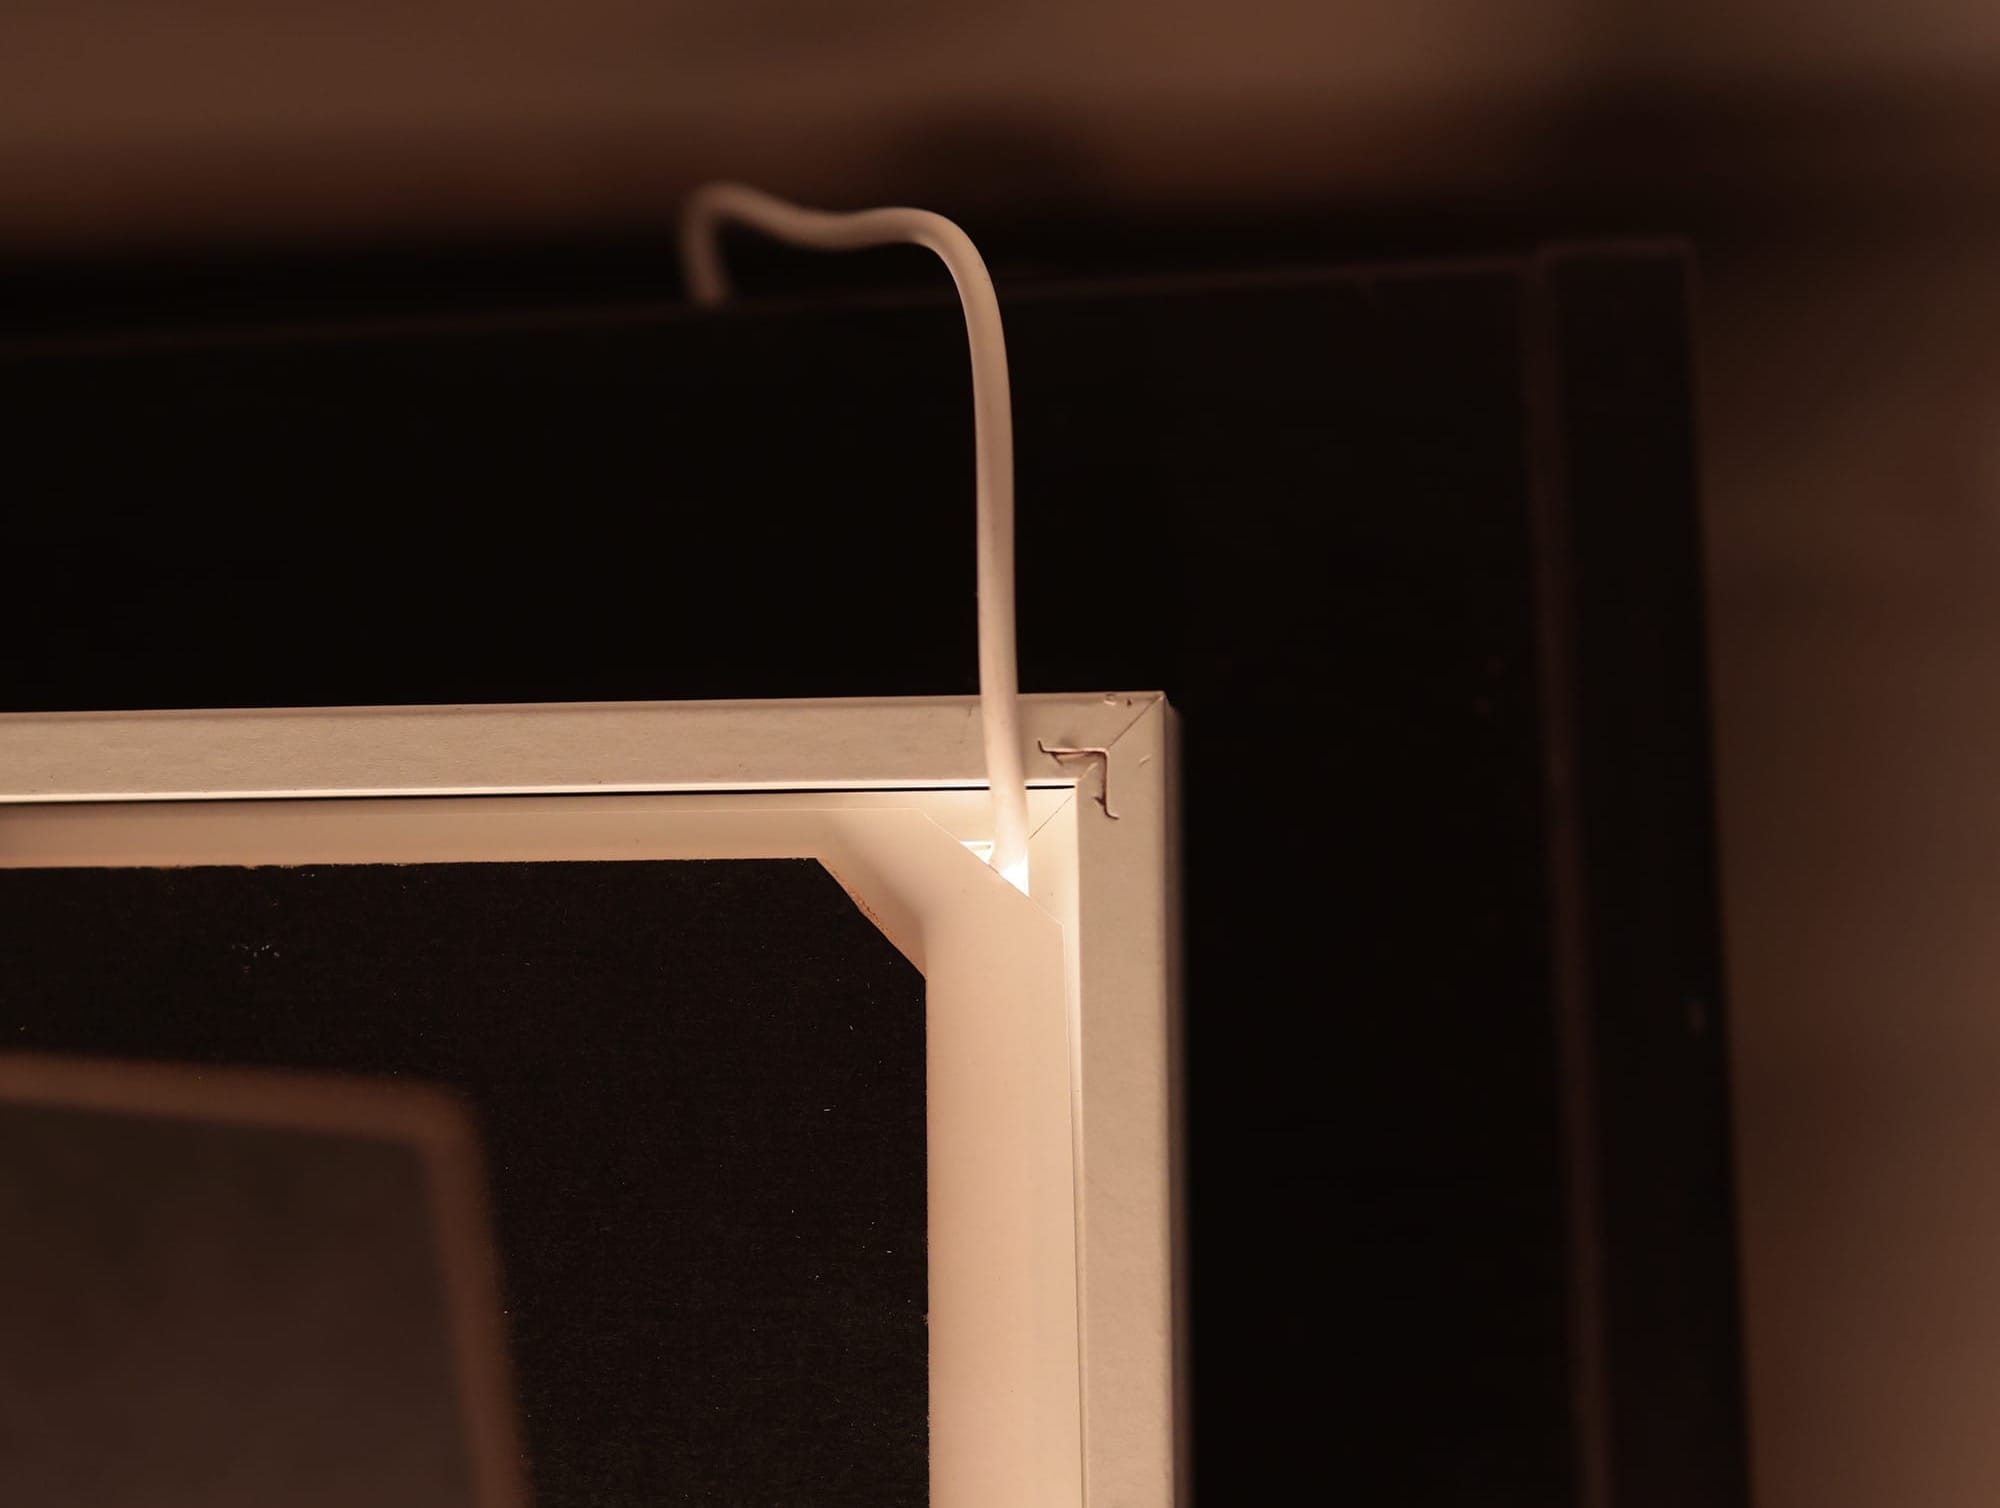
The wire should be able to come out of the corner of the frame easily.
Your bedside photo table lamp is now ready. Place it at the location of choice and connect it to power supply. And ta-da! Since the LED strip comes with a toggle on-off switch, the whole lamp can be used easily from the bedside.
Customise your table lamp according to mood, season or situation. It's perfect. Let your creativity take the charge, place quill arts, flowers, craft works, what have you, inside the photo frame and enjoy your lamp. This also works as a great personalised gift for a loved one.
Comments ()